SETUP REFERENCE · ADVERTISER
Bring your brand into a game
Set up inside the platform: Open Account setup to complete the real forms, save each step and resume later. This page is a reference; you do not need to follow it alongside the setup flow.
Your route from a brand kit to your first recorded campaign result. You choose the brand, message and campaign; the game developer controls its surface and its artwork approval.
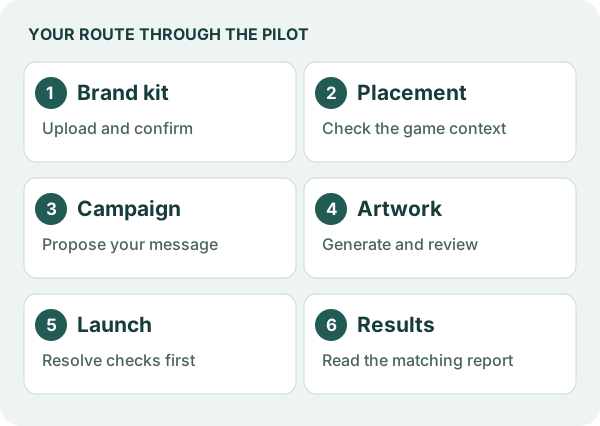
Jump to a step
Before you begin
Have your original logo, brand colors and guidelines, a short message, and any usage restrictions. Use materials you are permitted to upload. Billing and payouts are disabled: budget and spend amounts are planning values, and measurement does not establish human attention or payment eligibility.
Create your account, verify your email, then choose I’m an advertiser and enter your company or agency name. Returning users can sign in. Your account opens your own workspace. You do not need an owner-provided login or access to a developer’s integration tools.
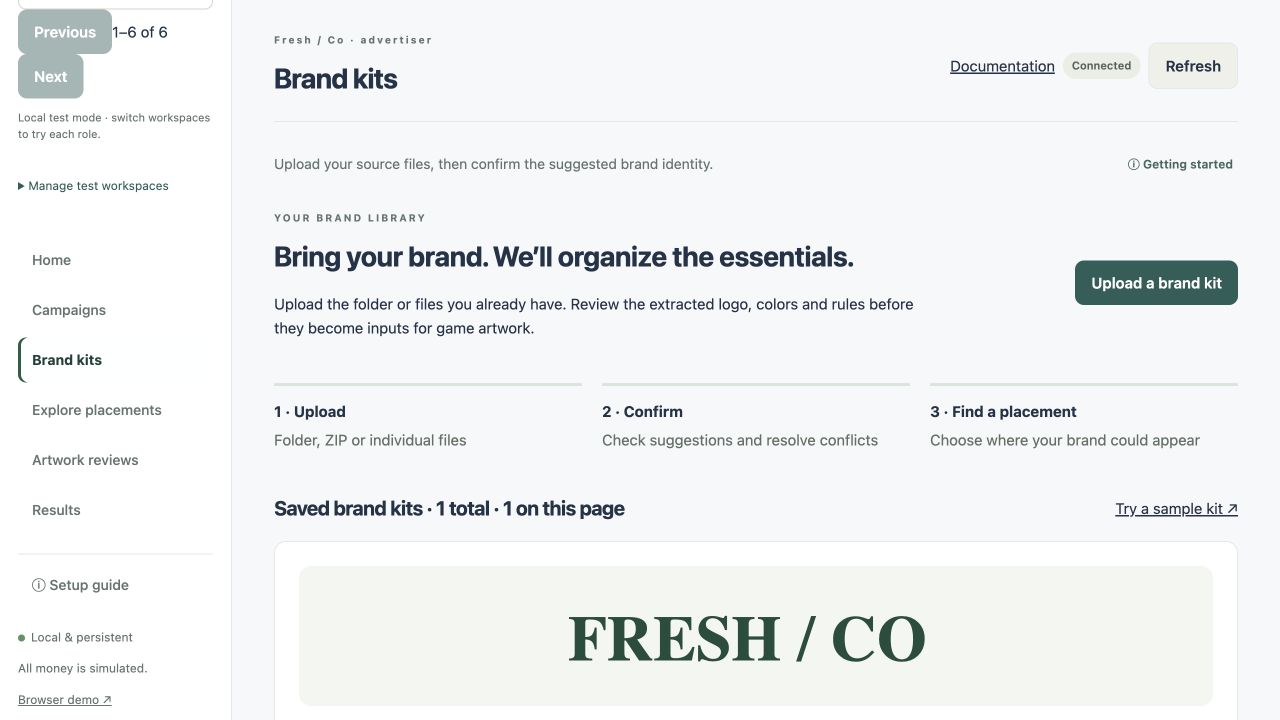
1. Upload and confirm your brand kit
Open Brand kits → Upload a brand kit. Choose a folder, ZIP or individual files, then select Analyze brand kit. Review the suggested logo, colors and rules. Resolve conflicts and missing details before confirming the kit. Preserve your original logo; a guidelines PDF is not automatically a usable logo file.
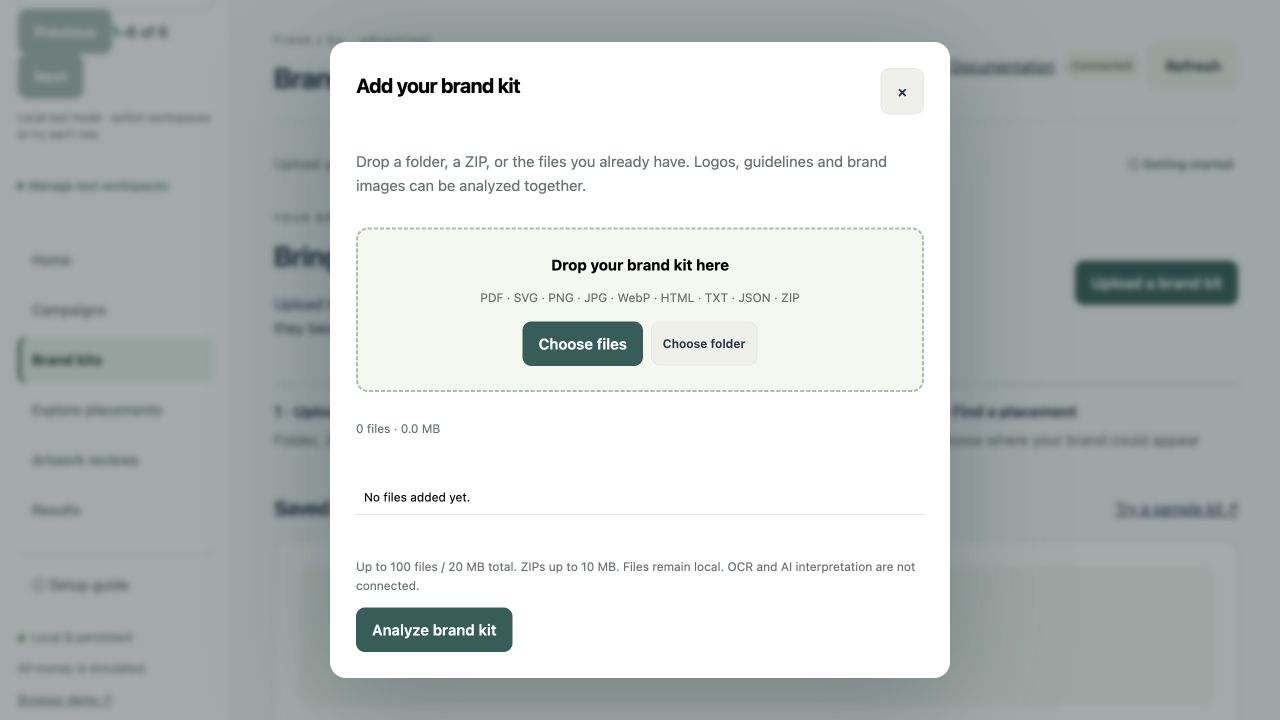
The current upload form accepts up to 100 files / 20 MB total, with ZIPs up to 10 MB. Read any more specific validation messages for individual file types. Scanned PDFs may need manual review because OCR is not connected. If you cannot provide a kit, Prefer to enter your brand manually? offers a manual setup route.
2. Find a suitable game surface
Choose Find suitable placements → on the brand kit, or open Explore placements and select your brand under Find opportunities for. Expand a placement to inspect its scene, permitted changes, protected elements, dimensions, accepted categories and preflight checks.
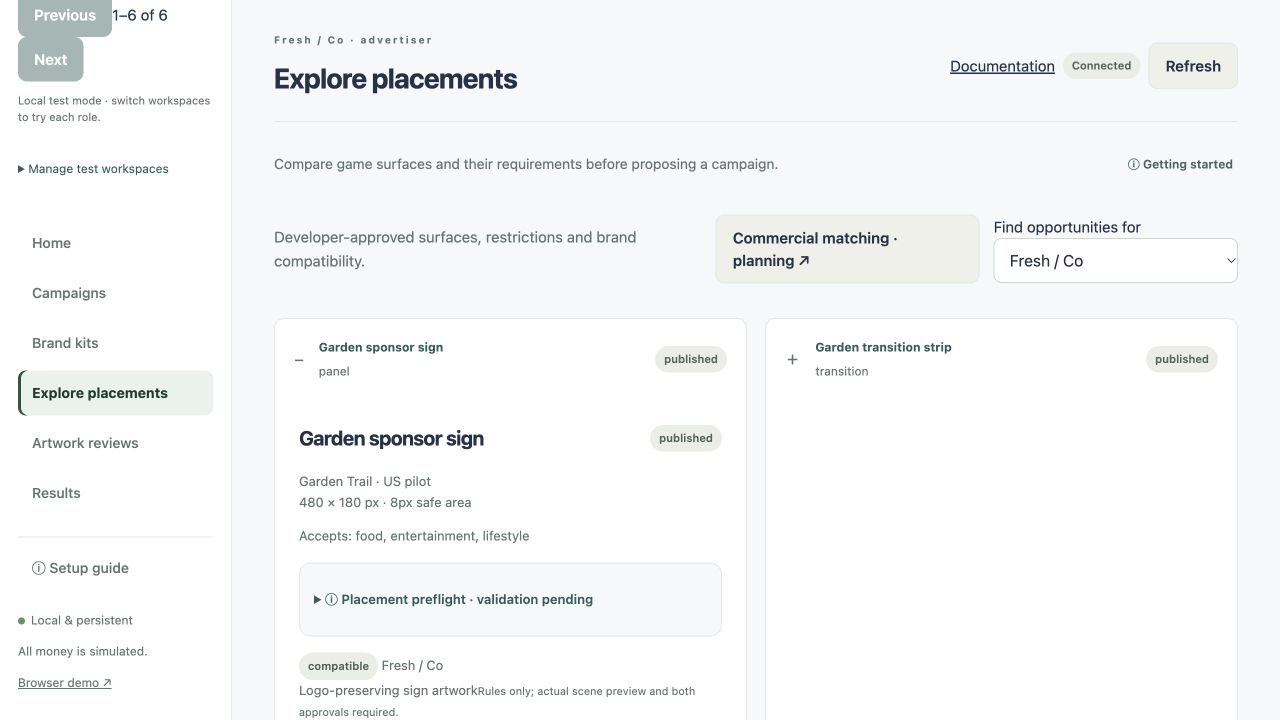
A compatible label means the configured rules match. It does not establish readability, verified delivery or audience reach. If the game context or marked surface is missing, ask the developer to complete it before approving artwork. If nothing suitable appears, check the brand category or wait for the developer to publish an appropriate placement.
3. Propose one campaign
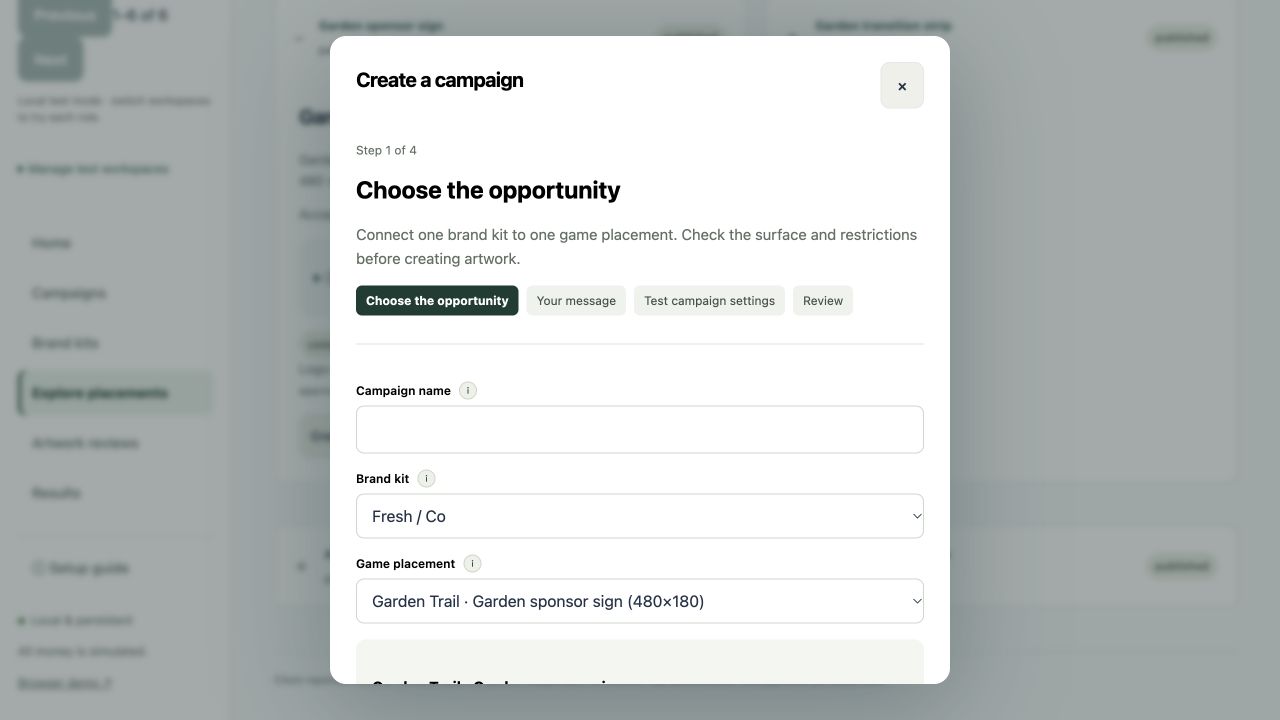
Choose Create asset proposal on the placement, or Create campaign in Campaigns. Name the campaign and verify the selected brand and game placement. Continue through Your message, Test campaign settings, and Review, then choose Create campaign.
Keep the headline short enough for the game surface. The budget, rate and end date are test settings; saving them does not charge money or launch the ad. If you use commercial matching, complete the applicable jointly accepted terms and resolve any launch blockers shown by the platform.
4. Generate and review the artwork
Open the campaign and choose Generate artwork. Select an available layout and generate a placement-specific version. Check the quality results, then choose Open artwork review. Inspect the original logo, message, contrast, size, surface fit and protected game elements. Approve only the exact version you accept.
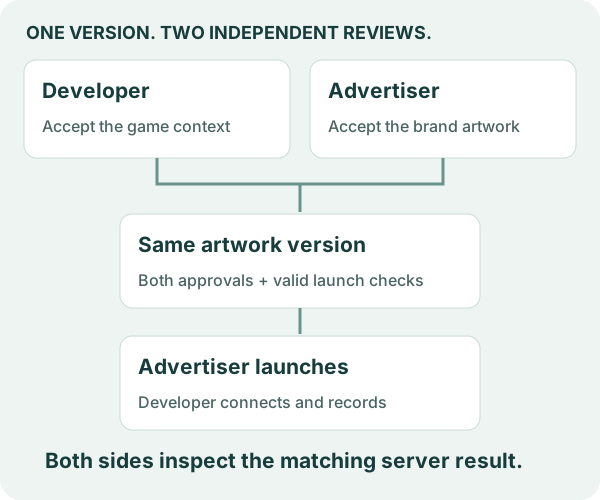
If you already have a finished design, choose Upload finished artwork instead. Upload a PNG at three times the placement dimensions, up to 3 MB. The platform creates the delivery sizes without cropping. File checks cover dimensions and delivery size; both parties must visually verify the logo, message, price, dates, contrast, safe area and brand rules. Uploading creates a new version and does not approve or launch it.
If checks fail, shorten or correct the message, change the layout, or work with the developer on the placement. Use Create new artwork when a new version is needed. That new version needs fresh review from both sides. If the placement has changed, check its revised context too.
5. Launch, then wait for a real recording
In the campaign, review Before this can launch and resolve its listed blockers. Choose Launch campaign when you are ready. A running campaign is eligible for assignment only while its checks remain valid.
The developer’s game integration must be ready to display the approved artwork and submit authorized ad measurements. Coordinate the first validation session with the developer. You do not need to install a test game or use phone pairing tools. A screenshot or generated preview does not prove campaign delivery.
Use Pause delivery to pause future delivery. Either party can withdraw its own artwork approval. Existing runtime authorization has its own expiry; pausing or withdrawing is not a promise of instant erasure of every device copy or received report. Relaunch is an explicit advertiser action after the required checks pass.
6. Read the result in context
Open Results for campaign reports. Match the game, placement, campaign and creative version to the artwork you approved. Keep current-version results separate from older artwork and other sources.
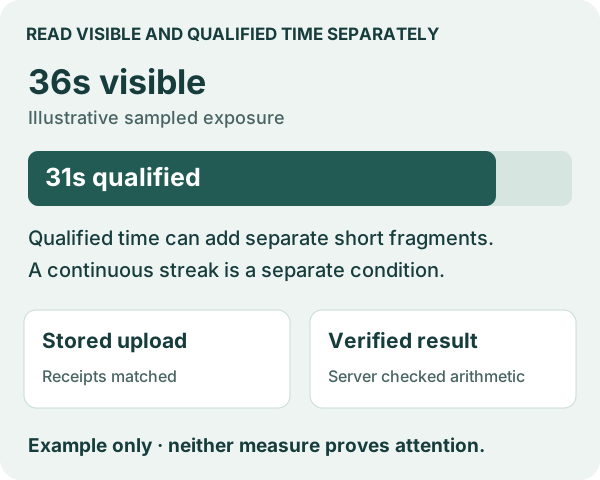
Visible time is sampled exposure under the recording method. Qualified time is the part that passes its policy checks, and can add separate short fragments. A continuous qualifying streak is a separate impression-candidate condition. None of these values independently proves that a person looked at the ad or authorizes a charge.
Check whether the session is Closed or Interrupted. An interrupted session can contain measured time without representing a completed recording. Coordinate with the developer if the result is incomplete or unexpected.
Campaign reports remain available after recording evidence expires. Detailed server evidence expires 30 days after its first accepted upload chunk. The retained report keeps the campaign and artwork reference, measured totals and completion status, and explains when the original evidence is no longer available for rechecking.
If something stops you
| What you see | What to do next |
|---|---|
| Missing or conflicting brand information | Resolve it in the brand-kit review. Use the original source material; do not assume extracted suggestions are authoritative. |
| No compatible placement | Check the selected brand and category, or ask the developer to publish a suitable surface. |
| Waiting for developer approval | Ask the developer to review the same version. Only they decide their approval. |
| Launch is blocked | Read Before this can launch. Fix the named issue rather than repeatedly selecting Launch campaign. |
| Running, but no results | Confirm the developer completed a session with authorized measurement uploads. Check your workspace and artwork version. |
| Incomplete recording or zero qualified time | Inspect the explanation with the developer. Do not treat missing evidence as a successful campaign result. |
Understand measurement in more detail · Developer walkthrough
Your final check
- The correct advertiser workspace contains the reviewed brand kit.
- The selected surface is published and its scene context is understood.
- Both parties approved the same artwork version.
- Launch checks passed and you deliberately launched the campaign.
- A matching campaign report is available, with its limitations and separate evidence expiry understood.
You can return to this guide from Reference guides in your workspace. For account access, use sign-in or password recovery. Resume unfinished setup from Account setup; for a placement or recording issue, coordinate with its developer.