SETUP REFERENCE · DEVELOPER
Bring your game to Adludo
Set up inside the platform: Open Account setup to complete the real forms, save each step and resume later. This page is a reference; you do not need to follow it alongside the setup flow.
Your route from a game surface to a verified ad recording. You control the placement and your artwork approval; the advertiser brings the brand and controls campaign launch.
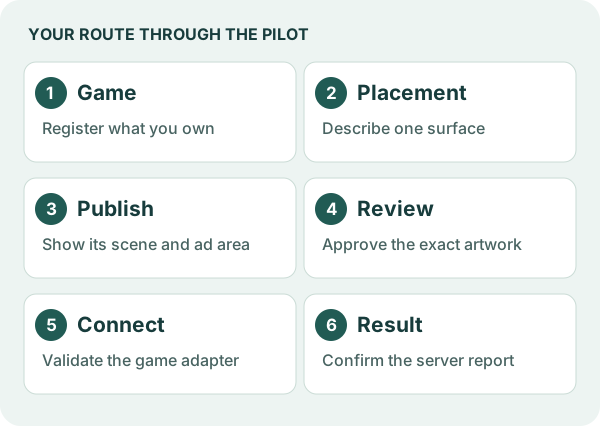
Jump to a step
Before you begin
Have your game name, a real scene screenshot, intended artwork dimensions, and rules for what may change. You will need a technical team to connect your game’s rendering and measurement integration. Registration alone does not install an SDK or make an integration compatible with your game.
Create your account, verify your email, then choose I’m a game developer and enter your studio name. Returning users can sign in. Your account opens your own workspace; you do not need access from an Adludo contact or another developer’s game.
Current availability: Game integrations still require validation. Billing and payouts are disabled; budget and spend amounts are planning values, not charges. Your account does not automatically publish a placement or start delivery.
1. Register the game you own
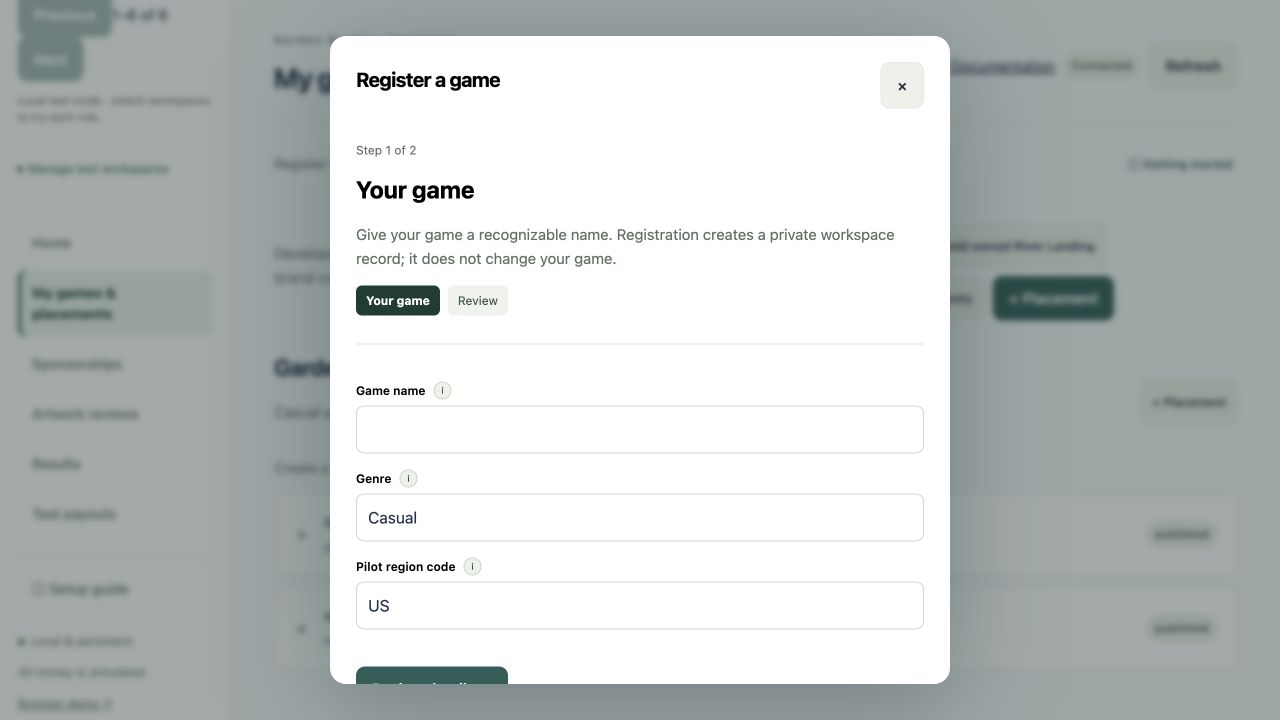
Open My games & placements → + Game. Enter the game name, genre and region code. Choose Review details →, check the fields, then save. If your game already appears, open it instead of creating a duplicate.
2. Describe one advertising surface
Choose + Placement for your game. Give the opportunity a clear name and describe when and where players see it. Continue to Artwork and restrictions: supply the texture width, height and safe area, choose the setting, and state what may change and what must remain fixed. Add the integration context, review the details and save.
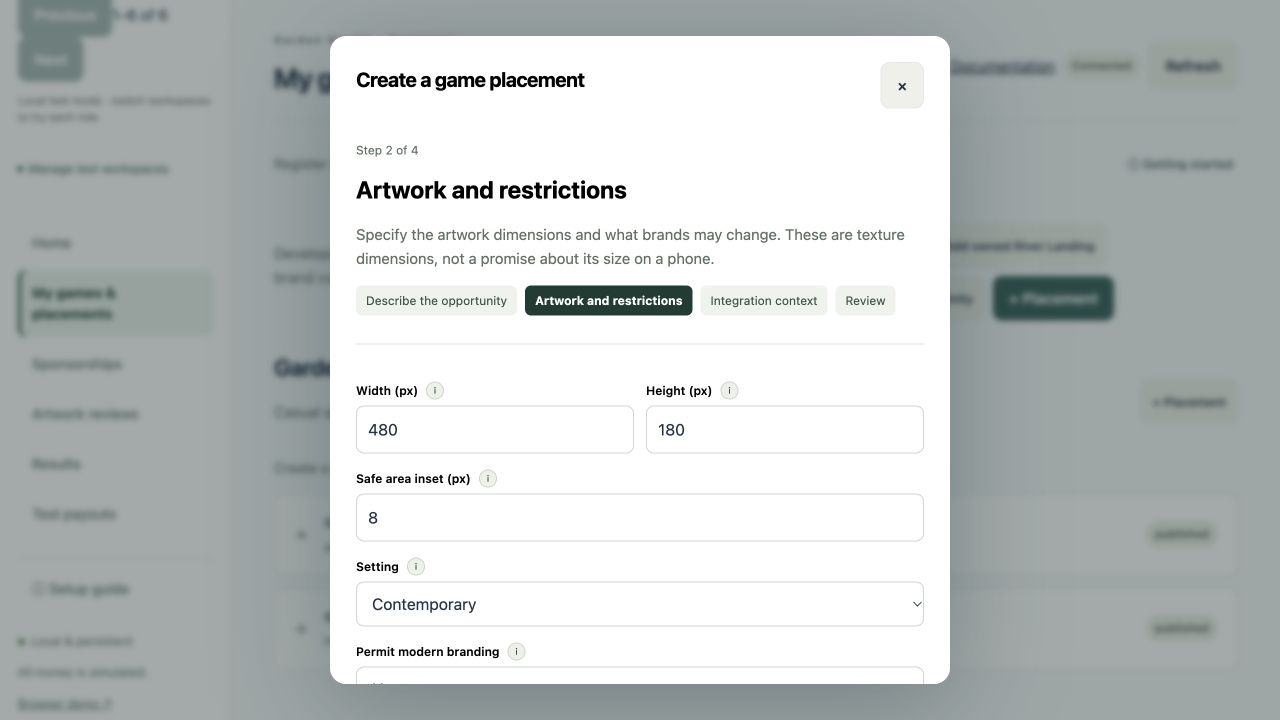
Example wording: “Only the sign’s printed face may change. Keep its frame, geometry, collision and gameplay behavior unchanged.” Use rules that fit your own surface. Texture dimensions do not establish the artwork’s readable size on a phone.
3. Show the surface and publish the opportunity
Expand the placement. Choose Upload game screenshot and attach a real view of the scene. Use Mark ad surface to identify the exact rectangle the artwork may occupy, then review the placement’s preflight checks. Choose Publish listing when the description, evidence and restrictions are ready for advertisers.
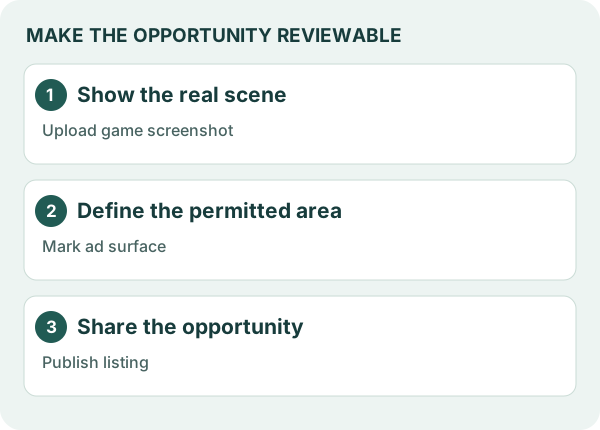
The screenshot route is the simplest starting point. For a model-based placement, the advanced controls let you upload a supported model and nominate its ad surface; follow the model inspection checks before publishing. A private Blender reference by itself is not an inspectable game preview.
4. Review the advertiser’s proposal
Open Sponsorships and select the campaign. Check Artwork in the game, the artwork version and any listed blockers. Choose Open artwork review to inspect the proposal in context: logo, message, fit, readability, permitted changes and protected elements. Save your approval only when you accept that exact version.
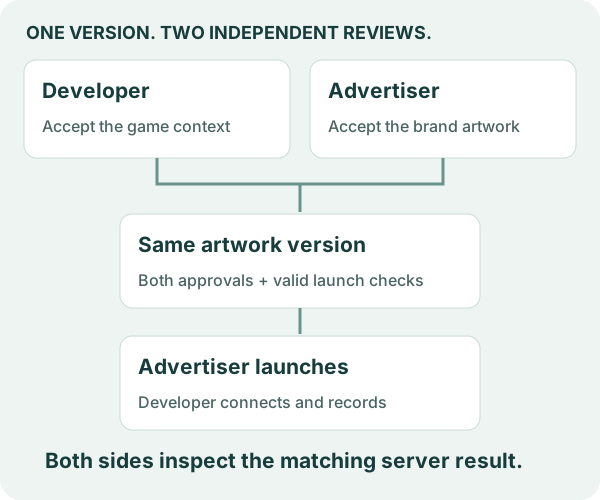
If the artwork fails its checks, ask the advertiser to correct or regenerate it. If the scene or nominated surface is missing, complete the placement evidence first. Changing the artwork or placement can require fresh reviews; an earlier approval is not approval of a new version.
5. Connect your game
Open My games & placements → Connect game beside your game. Give your technical team the registered game and placement information and the developer integration guide. The integration must map your actual ad surface to the correct placement, display the approved artwork, observe its visibility, and upload authorized ad measurements.
Download the current Unity SDK from the production integration guide. Its Quick Start: Local Preview sample lets you check local measurement before connecting delivery. Validate your game’s rendering method, session boundaries and upload adapter on the devices you intend to support. The local preview is offline and does not create a campaign report.
For production delivery, follow the production integration guide. Download your public game configuration; the SDK connects and recovers uploads automatically. Production uses separate data and excludes test-only campaigns.
In Account setup → Connect the reusable SDK, install the Unity package, register your adapter’s build and surface identifiers, and download your game configuration. Use the production origin supplied in that file. The SDK instructions appear in the setup step, with detailed integration notes bundled in the package. Production connections do not use pilot pairing codes. Other rendering methods need their own validated adapter.
Coordinate a first validation session with your technical team: confirm the intended artwork appears, end the session using your game’s normal flow, and check that its measurement upload completes. Your game decides how its sessions and consent controls appear; no particular test-game menu or phone pairing procedure is required by this guide.
6. Confirm the first result
Open Results in your developer workspace. Match the game, placement, campaign and artwork version. Check whether the session is closed or incomplete, then read visible time and qualified time separately. Your campaign’s Results for this artwork section shows the current version; Results also includes previous versions.
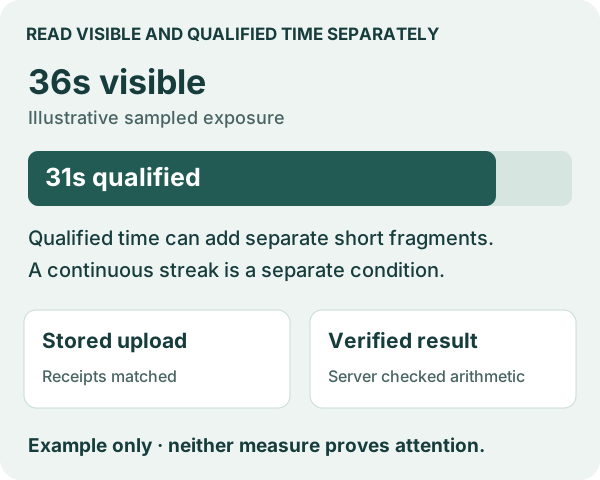
Detailed server recording evidence expires 30 days after its first accepted upload chunk. The campaign report stays available. It keeps the campaign and artwork reference, measured totals and completion status. Once evidence expires, the report explains that the original observations are no longer available for rechecking. Phone copies and backups have separate lifecycles.
If something stops you
| What you see | What to do next |
|---|---|
| No sponsorship request | Confirm the placement is published, then wait for an advertiser proposal. Publishing does not create a campaign. |
| Artwork cannot be approved | Read the campaign blockers. Supply missing scene evidence or ask the advertiser to fix the artwork. |
| Integration is not ready | Ask your technical team to validate your game’s rendering and upload adapter before a connected test. |
| An upload is incomplete | Ask your integration team to inspect the upload status. Preserve the saved evidence while they investigate. |
| No report after an upload | Confirm the workspace and artwork version, refresh Results, and ask your technical team whether verification completed. An upload receipt and a checked report are different stages. |
| Visible time but little or no qualified time | Check the policy, on-screen size, coverage, focus and sample continuity. Do not substitute a browser demo result. |
Your final check
- The correct developer workspace owns the game and placement.
- The published surface has scene evidence, a marked ad area and clear restrictions.
- Both parties approved the exact artwork version; the advertiser launched it.
- The integration was validated for the game and device used.
- A matching campaign report is available; you understand its measurement limits and the separate recording-evidence expiry.
You can return to this guide from Reference guides in your workspace. These checkpoints describe your first platform workflow; they do not certify every placement or replace your own review.